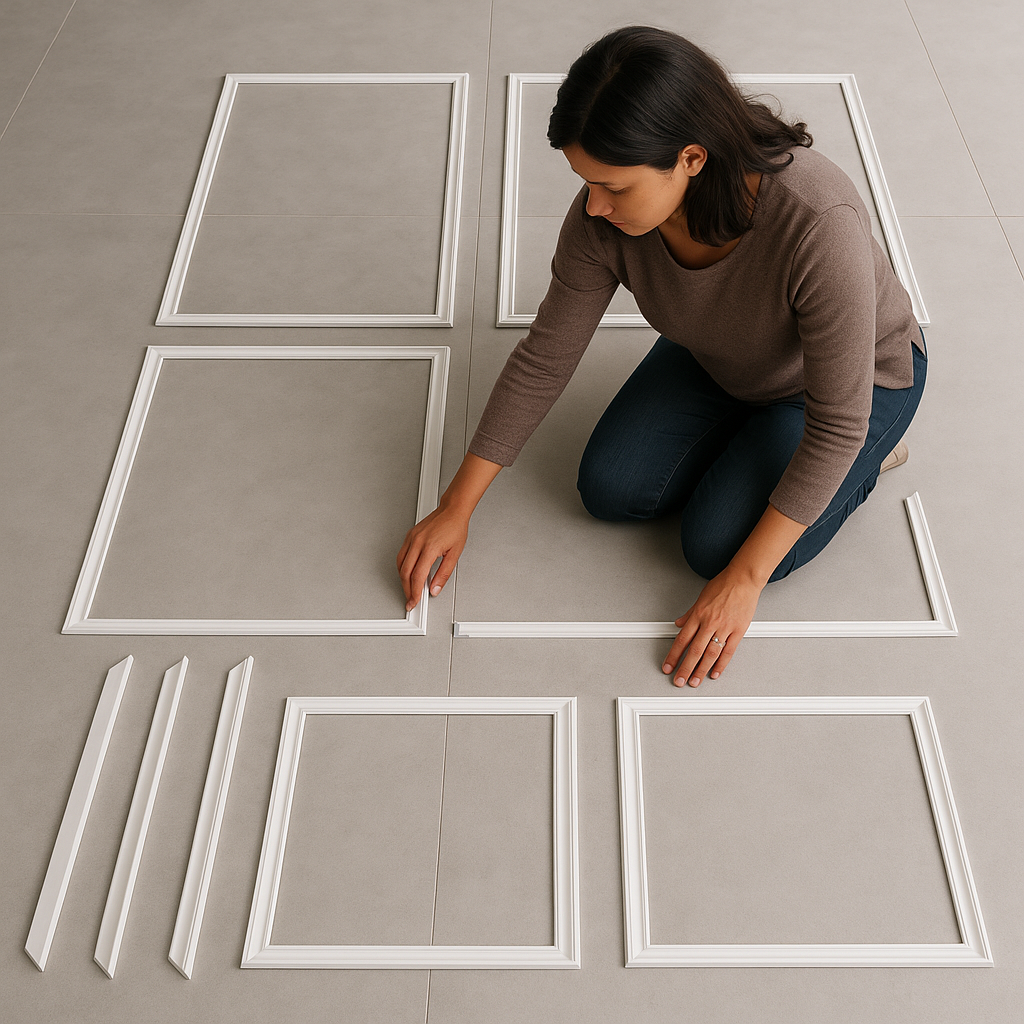
1. Unbox & Layout
Unbox all pieces and lay them out on the floor according to your design template (rectangles, squares, chair rails, etc.).
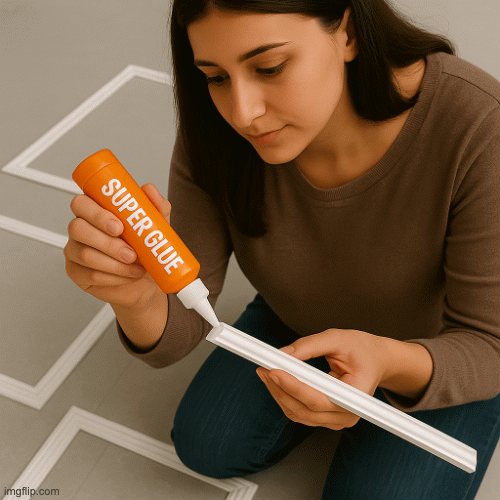
2. Pre-Assemble Frames (Optional)
Join the corners of each rectangle/square with a small amount of super glue (not included). This makes larger frames easy-to-handle which can later be installed directly onto the wall.

3. Prepare the Wall
Ensure the wall is smooth, dry, and free of dust. For best results, wipe down with a mild cleaner such as Selleys Sugar Soap (optional).
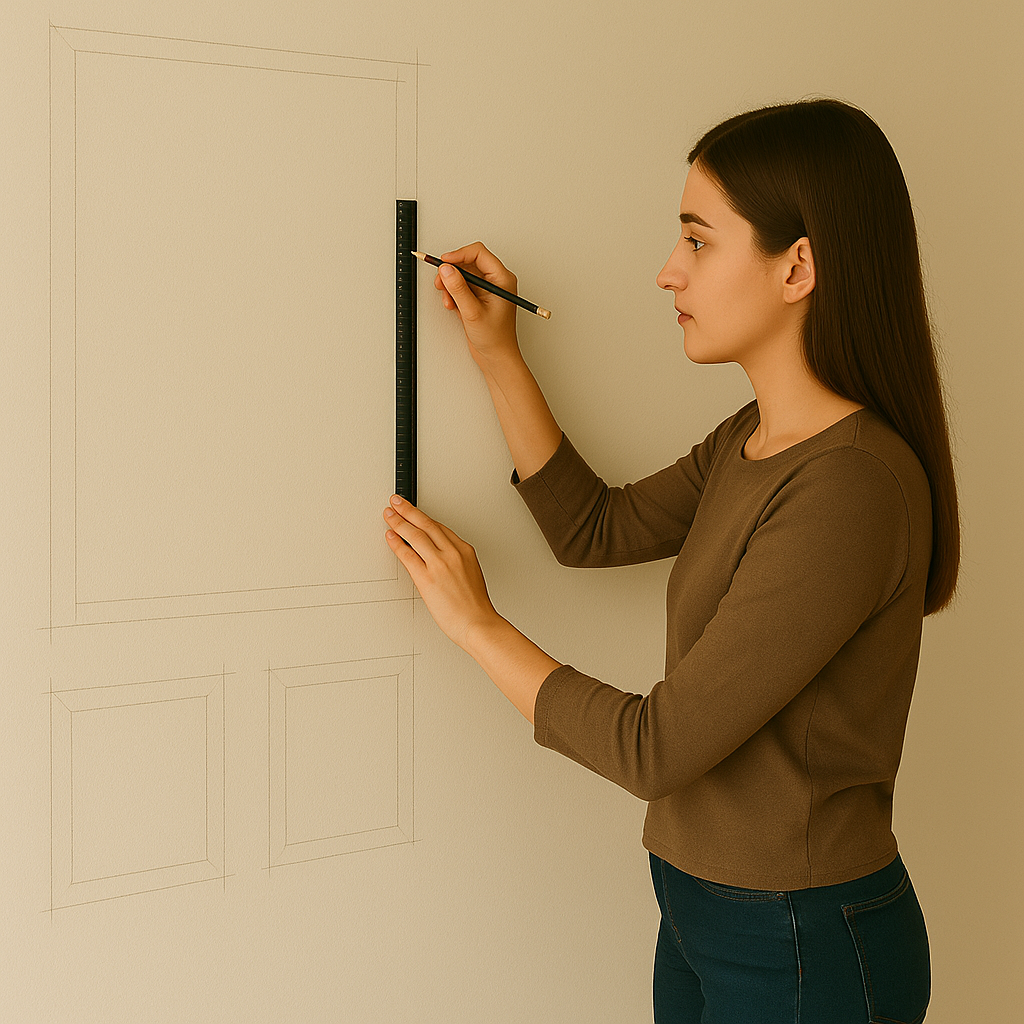
4. Mark Your Layout
Measure and mark the design layout onto the wall using a tape measure, pencil, and level/laser guide. This ensures straight, even placement.
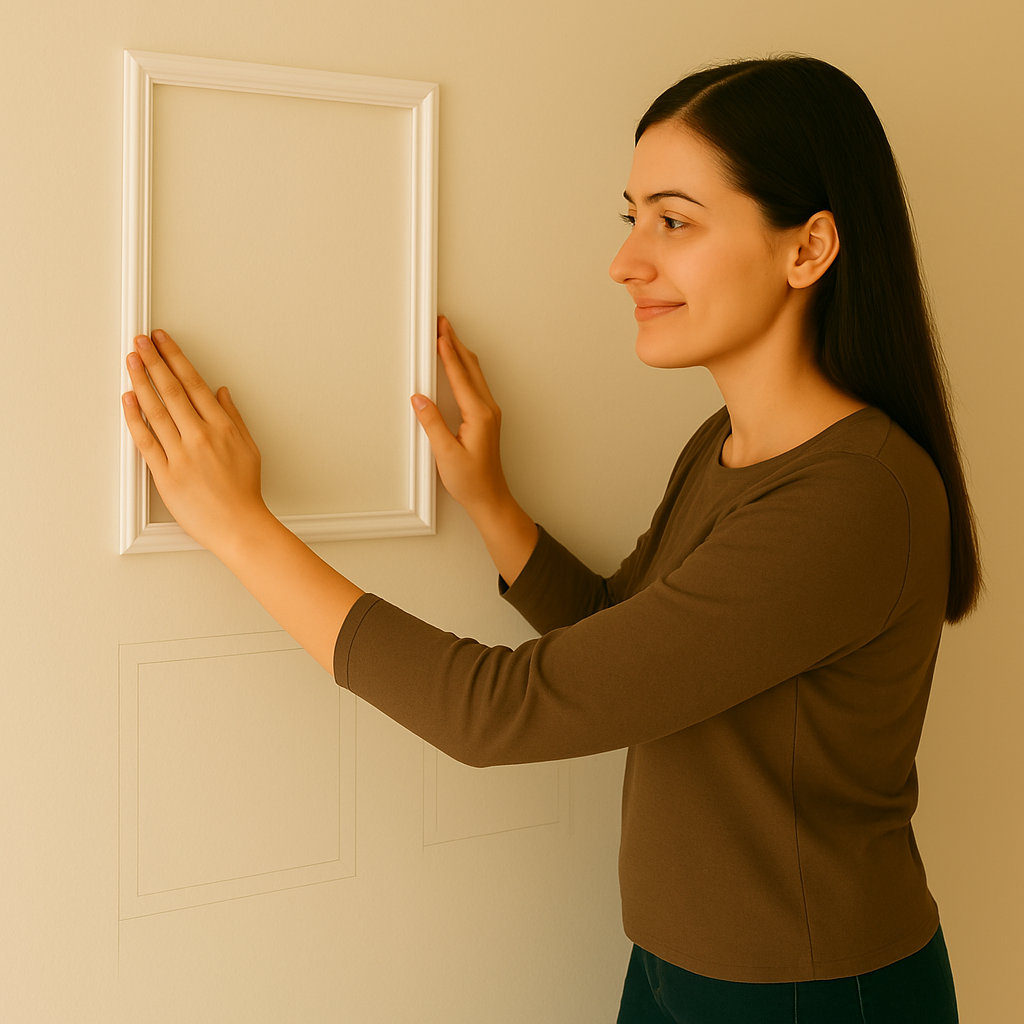
5. Peel & Stick
Remove the adhesive backing and carefully attach the pre-assembled frames (or individual pieces) to the marked positions on the wall.
(Optional) Need stronger hold? Apply Liquid Nail adhesive (not included) to the back before pressing.
Liquid Nail is recommended for Chair Rail pieces due to heavier format
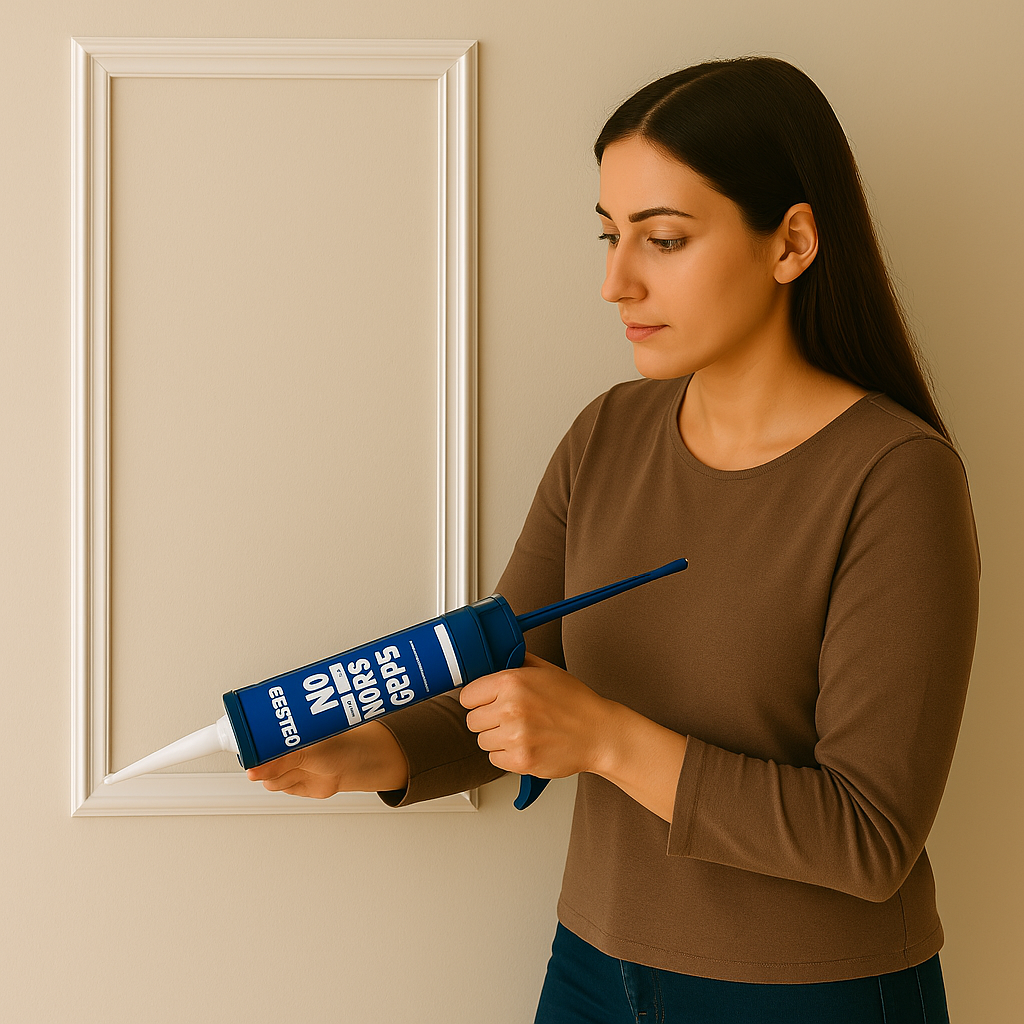
6. Fill the side gaps
Use filler or caulk to seal any gaps between pieces and at the edges for a seamless, professional finish. Smooth with a damp finger or caulk tool.

7. Paint (Optional)
Once installed, you can paint over the molding to match your wall color or create contrast. Use a primer if needed for better paint adhesion.